Monday 30 November 2009

More Regionals News

I've got a few pictures from Regionals to show you, and pictures of Swaps.  What are swaps?  Swaps are an unofficial part of any Stamping gathering (Convention, team meetings, Regionals, Incentive Trip) where you literally swap cards you have made with each other.  It is great fun, a nice way to get inspiration from fellow stampers and adds to your sample box or board.

I made 47 cards in total, with 2 designs to choose from.   Both cards used stamps and products from the NEW Summer Mini which starts tomorrow

The Butterfly card used a new stamp set called Butterfly Prints, and also the matching PUNCH!  (You know how I love punches that go with stamps!)  I've also used the Circle Scissors to cut out the Vellum circle (which looks slightly crooked now that I look at it! Bother!).  Because I could only put adhesive on the vellum behind my butterfly I added a new button with a glue dot to help anchor it down.

The orange card is very bright and summery!  It uses Razzle Dazzle which is a versatile set - you can see I stamped the single flower on the edge in Versamark, then made my own DSP with the red cardstock and Versamark and then made a feature of the pretty swirly flower.  To get the graduation of colours I used sponge daubers on the flower.  I applied a little glitter and added a sentiment (from Really Retro).

I have a few photos of the swaps I've received to show you, but I have to fiddle with Photoshop first before I can post them.  I will hopefully get faster with all this!

Once last thing to show you - are you after a cheap and easy gift idea for someone?  How about this?


I bought this plain little white dish for less than $3 at Spotlight, added a rub-on from the Bright Delights Rub ons, sprayed it with a ceramic sealer (also Spotlight), let it dry, then added some matching ribbon.  Apart from the drying time, it was seriously quick and easy.  I think with the sealer it would be fine to hand wash but I wouldn't trust a dishwasher or microwave.  I'm just going to add a cute tag and it's done!

The Rub-ons are easy to use and fun too!

Saturday 28 November 2009

Back from Regionals

...and feeling very inspired!

Just a quick post tonight as I've had a big day.

Here are the make and takes we made (and we got a stamp set and wheel from the NEW Summer Mini to make it with!  Eeeek!)


More details later, including pictures of swaps, etc.

Good night!

Thursday 26 November 2009

A Summer Mini Tease


As a Demo, one of the many perks I get is seeing new catalogues earlier than everyone else, and getting to order them earlier too!  Sad as I am to see the lovely Spring Mini go, I'm excited about the Summer Mini.  If you are not on my mailing list and want me to send you a copy of it, just contact me and you'll be able to drool over it too!

Can you guess the new products used in this sneak peek?  Admittedly it is  a poor photo taken at night without a flash, but I think you will get the idea.

Another perk of being a Demo i that I am going to Regional Training on the weekend - it is like a mini Convention, where I will socialise with other Demos, swap cards, listen to business tips and creative tips, and I get a stamp set to play with!  So much fun!  If you are curious about what it is like to be a Stampin' Up! Demonstrator, drop me a line, or else click on my Stampin' Up! Website (over there on the left) .

Remember my card box?

Well, take a look at the one this clever girl has done HERE.  What a gorgeous colour combo!

While I'm linking to other people's blogs,  here is a gorgeous project by a clever New Zealand Demo you have got to check out (I'm dying to try it).

That's enough from me today, I have to finish all my swaps before Regionals!

Have a great (inky) day!

Wednesday 25 November 2009

And the winner is......................


Comment number three, REBECCA O'GORMAN!!!!!!!

Bec, I'll pass on your details to the generous folk at buysterlighting   and they'll be in contact shortly.  

Congratulations!   Thank you Buysterlighting, and thank you my lovely contestants!
xx L

Monday 23 November 2009

FABULOUS PRIZE GIVEAWAY!

Yes, Gentle Reader, I am giving away a FABULOUS PRIZE !

If you, like me, do most of your crafting at night after the children have gone to bed, then you will be aware of how essential good lighting is.  Makes all the difference between an OK project and a great one.  Right?

Well, I'm giving you  a chance to win a gift voucher for some lovely new lighting to the value of $70 !

You might like to choose a light like one of these:


There are plenty more to choose from, which will you pick?

To enter, all you need to do is post a comment about the time of day you like to create.  Are you a night owl like me?  Or do you prefer to work during the day while your little one naps?  I will draw a random comment out of a hat.

Entries open only to Australian residents, sorry.  If you enter, make sure you provide your email address so I can get in contact with you.

Entries will close on Wednesday 25th   November at 8pm Brisbane Time!  Good luck!

Sunday 22 November 2009

Christmas is Coming....have you started your cards?

You missed a chance to get them started this afternoon!  We had a lovely intimate class today and made 6 cards, three each of two designs.
This is the first one, CASED from a design by the so-talented-she's-scary Andrea Walford.  It uses the cute snowman from Punch Pals, and the little snowflake from the same set.  I love this colour combo - Tempting Turquoise, Sahara Sand, Whisper White and Brushed Gold.    It is fresh and crisp and somehow Retro at the same time.

The second card is deceptively simple.  It is a one-layer card, yes, but there were a few steps involved in it:


And inside:
It used Gold Encore ink, the 11/4 inch circle punch, scallop circle punch, gold embossing powder, heat gun, Stamp-a-majig, Stazon ink, blender pens, and glitter.


My daughters, aged 9 and 5, were very keen to stamp with My Ladies, and they made some cards too:


My eldest explained that the Penguin was standing on the presents so he was tall enough to see out the "window".  Of course!
My youngest daughter made this creation for Santa with some stamps from Kikki K and dazzling diamonds glitter:


Don't worry if you missed this class; I'm running them for the next 3 Sunday afternoons.  Contact me for details.

Remember that the Spring Mini finishes at the end of November (a week!)  so if there is something you have had your eye on, like the gorgeous scallop oval punch, white Stayzon, Stazon Remover, Tree Trimmings, that yummy Parisian Blue SDSP, etc.....contact me ASAP to get your hands on it!

Stay tuned to this blog tomorrow (Monday, 23rd November 2009) for a very exciting PRIZE GIVEAWAY!    Can't wait!

Happy Sunday Night everyone!

Wednesday 18 November 2009

A Confession....

...my name is Louise and I am addicted to handbags.   Phew!  There, I said it.

To prove it, I've even been making them!  This is a design by the fabulous and talented Tracy Old, an NZ Stampin' Up! Demonstrator.  She designed this for UStamp (see the blinkie on the Left?).  UStamp's Holiday Project are now finished, but you can sign up for the next round now.  I'm going to!

Aren't they gorgeous?  I used the Slumber Party SDSP (it is double-sided, cardstock weight DSP and is PERFECT for making 3-D items, as well as cards!)  I donated one to my sister's Pink Ribbon Fundraiser as a raffle prize, one went as a door prize at our WCMD Event, and I still have one left.  I'm thinking this will be the perfect gift for female relatives, teachers, coaches, etc this year.  So as not to waste anything, I made cards to go in the bags using scraps of this lovely paper.


Sorry the colour is a bit strange, I am still learning about Photoshop Elements!

So if you've looked at the lovely Speciality DSP in the catalogue (Parisian Breeze in the Mini is going to retire at the end of the month!  EEEK!) but wondered what to do with it, wonder no more.

I'm making a few boxes etc with it at present that I will show you when I've finished - makes a gift more special when the wrapping is impressive, no?


Saturday 14 November 2009

A Colour Experiment from the Handmade Institute


Some of you may love the solid image stamps (and so do I!) but be a little bit afraid of the line-art image stamps because, well, you need to colour them in, and how do you do that?

Fear not!  Here at the Handmade Institute, we have spent hours in the lab experimenting with various methods to bring you colouring satisfaction.  Or something like that.

I have stamped some images  on watercolour paper (not SU!, as I needed a large sheet)  with Jet Black Stazon ink.  I coloured them using watercolour crayons,  an aquapainter, blender pen, pastels, markers and classic ink pads.  Each gives a slightly different look, so your choice will depend on the effect you want to achieve.

Here is my very scientific chart, with the results:


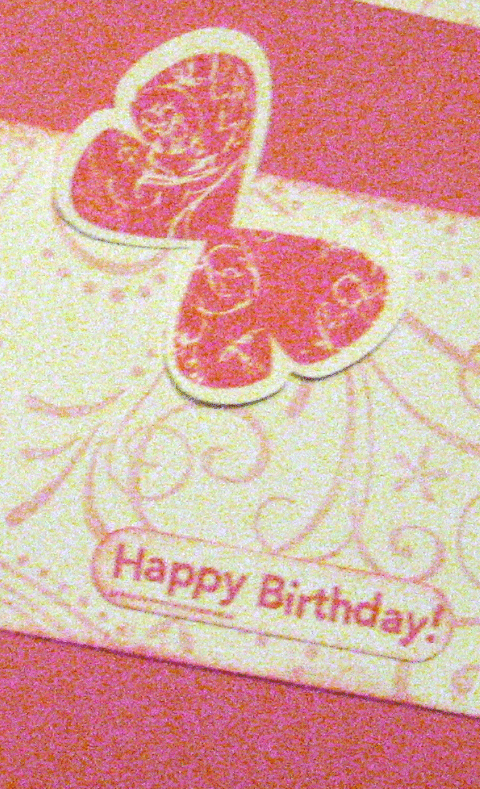
By way of contrast, I've included the butterfly (a solid image) which I coloured with watercolour crayons directly to the rubber, and spritzed with some water.  The purple one was perhaps a little too wet!  Well, it was an experiment, right?


This cute little hippo from Pun Fun was the perfect choice of a line art image to colour.

 
First I used my Watercolour Wonder Crayons, with my aquapainter on the blue, and with a blender pen on the purple.  At present I only have the crayons in Soft Subtles and Bold Brights, but I think I will be enlarging my collection as I found them easy to use and they blend beautifully.  You can scribble on the paper directly, or take colour from the bottom of the crayon with your aquapainter/blender pen; I did both.


Next I tried using ink from my Stampin' Spots (full sized pads work very well too, you squeeze the pad a little before you open it and then you end up with a pool of ink on the lid for you to use as a palette).  I simply smeared a little ink on the plastic "clam shell" stamp case and picked up the colour with my Blender Pen (Left side).  It is quite easy to use, although I noticed the paper "pilling" a little as I tried to blend the colours together.  Not enough to be too annoying, but in the interests of science I'm telling you what I found.  The quality of the paper may be a factor there. I like the control you have with a blender pen; it is easier to keep within the lines and you don't need to wait as long for things to dry between each coat of colour.    On the other one, you see the difference when I used my aquapainter; much more "watercolour" in effect.Its a little messier and blurred, but that is the nature of watercolouring.


This is the most vibrant image - I used my markers to add a line of colour then blended it with the aquapainter.  It is my current favourite colouring technique.  Unfortunately I was a little messy here (I was watching TV at the same time!) but again, that adds to the watercolour look.


Yes, you can use Stampin' Pastels to colour directly with a cotton bud or sponge dauber, but here I tried using my blender pen on the left and aquapainter on the right.  I have to say it is perfect for a subtle look.  Very difficult to get a deep colour on your image (except with Pink Passion, wow that looks bright!) but if a soft look is what you are after, then it is perfect.  Would be lovely on a baby card, or a wedding card perhaps?

So there you have it!   I certainly haven't exhausted the colouring methods - I didn't try watercolour pencils because I don't have any.  Rest assured if I get them I will subject them to the same scruitiny!

I hope you found this helpful.  What is your favourite method of colouring and why?

Thursday 12 November 2009

Christmas cards, as promised!

Here are the cards I made recently, using a base card of Kraft, a Riding Hood Red layer, and the tree from the Holly Jolly Christmas set.    My starting point was actually the trees - I stamped out a lot of trees in Old Olive and cut them out  without really knowing what I was going to do with them.  I stamped a background with the flower from Season of Joy, the flourish from Season of Joy, or the swirl from Spotlight on Christmas.  I sponged the edges with RHR.  Then I used ribbon, some hodgepodge, and some hostess sets (Punches Three and last year's retired set that I can't remember the name of!).  Some glitter on the trees, and all done!  Most of the trees were adhered with Dimensionals too.


Hello, *tap* *tap* this thing on?

It has been so long since I've updated my blog that I am sure there is no one out there who remembers me, LOL!

To tell the truth, I was so wiped out after WCMD that I took a mental health break away from my craft lair to recharge a bit.

Fortunately I've found my mojo again, and I have been back to the craft lair creating lovely Christmas Cards. (which I'll show you soon) I've also been working on swaps for our Regional conference here in Brisbane at the end of the month, but as they will use NEW products from the Summer Mini (starts 1 December) I can't show them to you yet.

Also I've been playing with my Stampin' Up! Website (click on the picture on the LEFT over there) and trying new ways of communicating with my customers.  I'm a bit of a Luddite, so it takes me a while to get the hang of computer things!

November Specials and Promotions - I've just emailed my customers an e-card with those, and if you would like to join my mailing list, you can easily do so with the click of a mouse on the Stampin' Up! Website.  Alternatively, you can email me on louisesutton@internode.on.net and I'll put you on the list.
Here are the current promotions:


And the Recruitment Promotion is still running:


Classes - I'm holding a Beginner Class this Sunday (2pm-4pm) for anyone (Brisbane) who has thought about making their own cards but doesn't know where to start.  If you are on my mailing list but haven't made it to any of my other classes yet because you think they sound too difficult, this is the class for you!  Let me know if you'd like to attend a Beginner Class but can't make it on Sunday, I'm sure we can come up with another time that will suit.

For the next four Sundays after that, I'm running Christmas Card Classes.

The cost for the Beginner Class is $10, you don't need to bring anything at all.  The Christmas Card Classes will be $15, bring your own basic kit (adhesives, bone folder if you have it, paper snips if you have them, etc).

Bring on the photos!

Here is a lovely little box I made recently (it's a UStamp project) with gift tags and cards inside:


I used Riding Hood Red cardstock, RHR DSP, a stamp from the Curly Label Punch Bundle (which is featured in this month's specials), the lovely wide RHR and Very Vanilla ribbon (about to go for good when the Spring Mini finishes).  The cards inside use A Flower for All Seasons (fun to colour!) and the tags use Spotlight on Christmas.


I gave this pack away as a Lucky Door Prize at WCMD.  I hope they liked it!  Another door prize I made was this sweet bundle of notecards made with A Flower For All Seasons.

Watercolour paper really makes a difference when colouring your images with your aquapainter.

I shall have to show you my recent projects a little later as I need to dash now to get my daughter to the dentist!

Sunday 1 November 2009

WCMD Success!

 Thank you to everyone who came along to our WCMD yesterday, what a fabulous day!  Thank you to my fabulous friends and SU! Sisters Linda, Rebecca and Stephanie for all the hard work and good humour which made a big and busy day a lot of fun.  Thank you also to our team of helpers - our husbands and Bec's and Linda's Mums and our children who did a lot of work behind the scenes also.  


Here are some photos from the day:

Can you find yourself in this photo?  

Here are the three Christmas cards I designed.
The first one is a Notecard which uses One of the stamps from the Level One Hostess Set "Punches Three", and the Riding Hood Red striped ribbon from the Mini (which ends at the end of November)


The Santa card uses "Holly Jolly Christmas" and the punched out stars were inspired by a card that Marelle Taylor did for her Incentive Trip swap.


Last of all, a card using Tree Trimmings from the Mini (Again, GET THIS before the end of November people!).  It also needed a lot of Stamp-a-majigging (is so a real word!) so I bet there were a few people cursing me when they were making this card! 


Next, here are some of the "Little People" who made it all possible: Steph's kids Jess and Jackson, my child Siobhan and her friend Laura (here helping Linda)

Thanks kids! 


And the Men Behind The Women of Stampin' Up!  (two out of four, anyway)
Aren't they wonderful?  Neil (Steph's husband) and Michael (Linda's husband) behind the scenes working hard.

I have other photos I'll have to show you another time, as I'm still very tired from the big day yesterday.


Edited to add:  GAH!  I have no idea why there are big spaces and things.  I am a complete Gumby when it comes to all things computer.  


Getting closer....

It's nearly that time of year, where the retirement list comes out.  That means the in-colours we've loved the past 2 years are leav...