Sunday 30 November 2014

Quick 'n easy tags with My Digital Studio


I love being able to make things on the fly - let's face it, with all the craziness going on at this time of year, I'm never as prepared as I'd like to be.  This is something you can have up your sleeve - you can make them up quickly, or have them all ready to go, depending on your schedule.  
This MDS download is perfect for tags - or for a bit of Christmas Subway Art!  I love it.

All I did was make a blank A4 page for my project, then recoloured the stamp to my liking, sized it to the tag size I preferred, filled the page and printed out a whole page on Whisper White Cardstock on my home printer.  Ta Da!

Then I just used my paper trimmer to cut out the individual tags, and punched the top (or bottom) of the tag with the Angled Tag Topper Punch, put a little Baker's Twine through the hole, and they were done.


If you'd like to make these yourself, click on the links below!
post signature

Wednesday 26 November 2014

Easy Christmas Presents for Teachers

If any of my children's teachers read my Blog, look away now!  LOL.
Yes, I've discovered PicMonkey, and I'm amusing myself trying new effects!
I'll post about the tags - made with My Digital Studio - tomorrow, I hope.  Today's post is all about the super-easy and cute Mini Whiteboards I made.
The frame is from IKEA, and I need to go back to get more!  
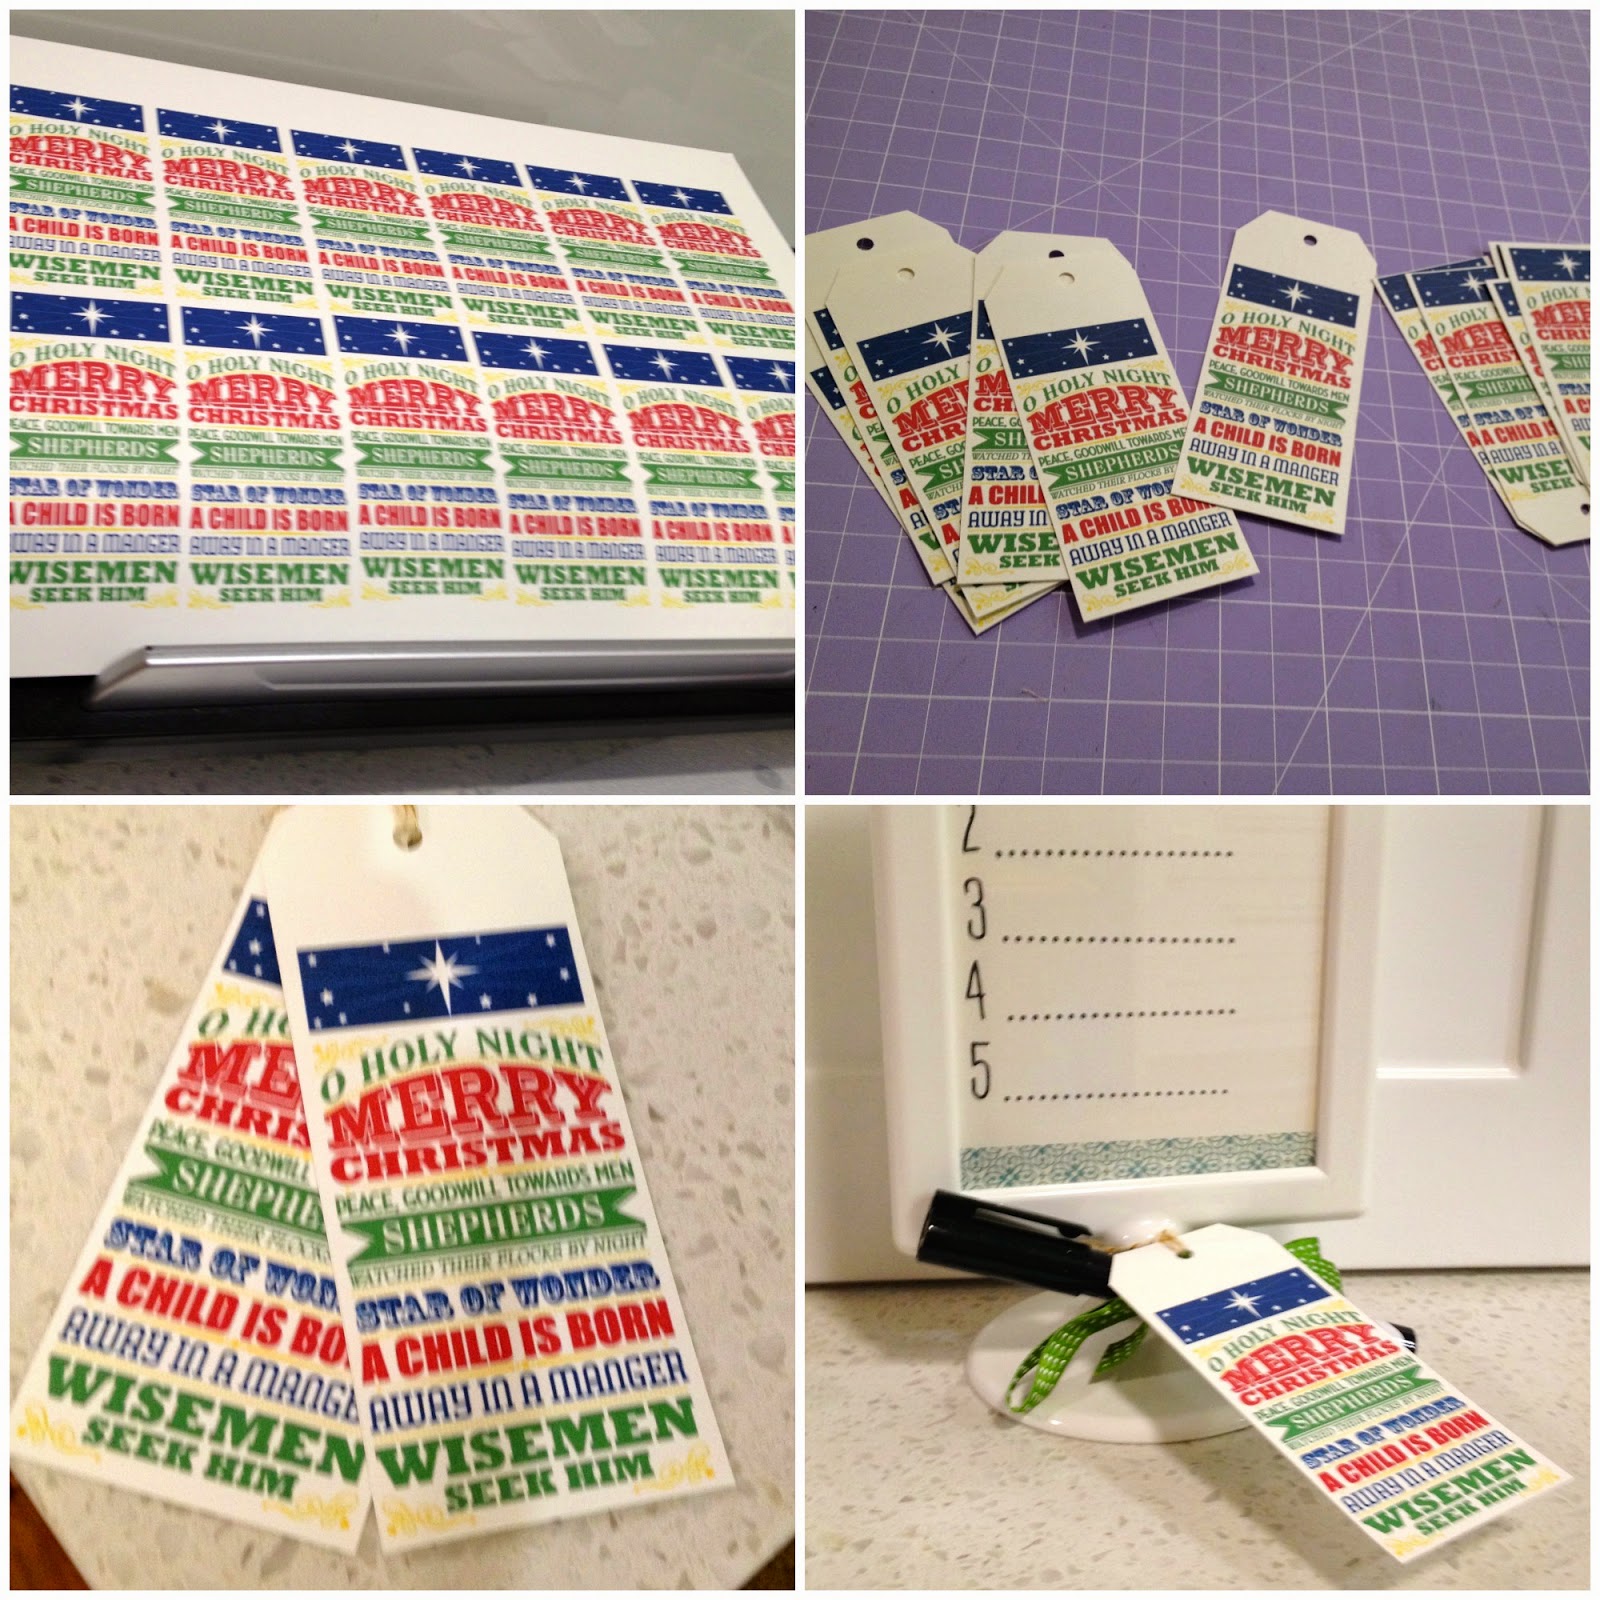
How cute is this little desktop Whiteboard?  You can write on it with a dry erase marker (I have attached one to the frame, of course).  I made this little list - perfect for To-Do's with some Whisper White cardstock,  stamped with black ink.  The numbers and dots are in the Project Life Stamp set.  Then I added a little washi tape top and bottom and the job is almost done.


A dry erase marker attached with some retired ribbon, and on the other side:-


Cute free printables!  I have a collection of them.   I printed them at home onto whisper white cardstock, but you could get them printed elsewhere.   I downloaded my printables from :
2. Elegance & Enchantment (this is no longer free, but was when I downloaded it)
4.  Elegance & Enchantment (Again, no longer free, but new freebies added each week)

If you search "Free Printables" on Pinterest, you will be lost for hours.  There are thousands of gorgeous freebies out there.


You could make one yourself with My Digital Studio - unfortunately I am having some trouble with mine (SU Support are helping me with it) so I used the freebies I already had in my stash.  

I added a tag I'd made previously with My Digital Studio (before I started having issues - I'm sure they'll be ironed out soon) tied with gold striped Baker's Twine.  

What do you think?

post signature

Thursday 20 November 2014

Graduation Cards


This week marks the end of school forever for this year's crop of Year 12 students.  My daughter volunteered my services to make six cards for the girls in her House who were graduating and I took up the challenge.  The photos aren't brilliant, as I only had time to snap a quick pic with my phone before they were whisked away.
I used one of my favourite stamps - Feel Goods (page 36 of the Catalogue) - because I feel the sentiment "She Believed She Could...So She Did" is particularly inspiring to young women.


And inside, these words from the Something To Say stamp set are pretty applicable for graduates!

Here are blurry close ups of each card - pretty simple, but special all the same.  


Here are all the products I used to make these cards:
post signature

Thursday 13 November 2014

Time savers? Yes, Please!

You'd think I'd have learned by now.  Yet, here I am again, mid-November, taken by surprise that Christmas is only 6 weeks away.  
I know that when October swings around, things in my busy household suddenly get frantic.  My kids (the 4 Things as I affectionately call them) are now 14, 12, 10 and 7.  Between them, my children are in three choirs, five bands and play French Horn, Cello, Violin and Saxophone.  Then they have sports on top of that.
September and October account for four birthdays in our immediate family and our wedding anniversary.  Add to that assignments, choir and band practices, recitals, sporting competitions, award nights and end of year band/choir concerts and the lead up to exam period and things get even more frantic.  Suddenly I need to have cards on hand for birthdays, school events, teachers, coaches, tutors and for graduating friends, on top of preparations for Christmas.  And then it is November.
Remind me that I need to get started in September next year, won't you?
Anyway, I'm sure the rest of you are just as busy as I am.  Which is why I'll let you in on a few timesaving tips I've stumbled upon.

1.  Card Kits
All these cards made with one kit - everything included to make 20!  
Have you noticed the amazing card kits we have in our catalogue?
  
I have the Hip Hip Hooray Card Kit, it contains everything you need to make up 20 cards with about three different sentiments.  I made up the whole kit in one sitting and it didn't take me long.  I then put them in a box, ready to use as required. 
I usually make my cards from scratch, but sometimes I find my stamping area is a mess, and my mojo has run away, and I'm caught out last minute.  That's when these cards come into play.  I also think I might package some up together in bundles of five to give as teacher gifts perhaps?
I used four of them recently as birthday cards for parties my children were invited to on a busy weekend.   Slipped a gift card inside, and Bob's your uncle!  Some of the cards are a little of a difficult fit for the envelopes once they are made because of the popped up layers.  An easy way to fix that is to custom- make your own envelope - also an easy way to jazz up your card.  
The card was too snug for the matching envelope, so I quickly made an envelope to fit.  Love using up odd bits of leftover DSP this way!
2.  Envelope Punch Board

This is seriously quick and easy to use.  
Look pretty cute, don't they?
I cut out a couple of labels quickly with my Big Shot and hand wrote the name of the recipient.  Easy Peasy!


Seen how to use the Envelope Punch Board?  here's a video made by Stampin' Up!


Thursday 6 November 2014

Halloween Recap

I can't believe it is November already!  What happened to October?  

Since my last post, we've had a busy time with Thing 2's 12th birthday, about 5 seperate music recitals and an Awards Night.  Oh, and Halloween.  

Do you celebrate Halloween?  It is a fairly under celebrated festival here in Australia, but it seems to be gaining popularity.  I love decorating for Halloween, even so.


These sweet pumpkins were made for my children by my clever Downline Michelle Hindmarsh (who doesn't have a blog).  
Aren't these gorgeous?  Michelle Hindmarsh made them for each child in her sons' classes.  She's amazing!  She used the Curvy Keepsake Box Thinlet die and her Big Shot, some sponging, and the leaves were also cut out with the Big Shot using the Autumn Accents Bigz Die.  She filled them with treats, and gave me four, one for each of my Things.  


I'm fortunate enough to live in a street with many children the same age as mine, which is wonderful. Weekends and summer days are typically punctuated by roving bands of kids going from house to house raiding their fridges and impromptu games of touch football.  It makes Halloween extra fun as well.

I made a quick Digital Project Life page using My Digital Studio:

As usual, I really had to scramble for photographs, as my children pretty much ran off in a pack before I could say "say cheese!"

As it is Wednesday, we have more Weekly Deals too:


Be sure to go to my Online Store so you don't miss out!


post signature

Getting closer....

It's nearly that time of year, where the retirement list comes out.  That means the in-colours we've loved the past 2 years are leav...