My little Thing Three had a Christmas Craft day at school on Monday, so naturally I was roped in to volunteer to make things with her friends. It was a fun day - think desks pushed together to make little craft stations, with parent helpers assigned to various activities. There were headbands to be decorated, reindeer decorations, cookies to be adorned with sweets and icing, pine cones festooned with glitter, T shirts being screen printed, and close to 80 excited little girls going from one activity to the next. Madness! But fun.
Of course, my station was for making cards and tags. I kept it simple (I've been to one of these days before) by preparing as much as possible ahead of time (e.g.. Cutting up base cards and pre-scoring them, cutting out the elements to make the tags, etc) by only designing one layer cards, with one colour ink pad per stamp. Here they are:
 |
| This was the most popular design! I think the bright Cucumber Crush green drew them in. Inside, they stamped their "Merry Christmas" sentiment. |
 |
| This one featured Mint Macaron, and it was my favourite. The tree was punched with the co-ordinating punch. |
And here are the tags the girls could make:
 |
| I cheated and printed out the "Merry & Bright" and "Be Merry" with my computer, and punched them out with the 2" circle punch. |
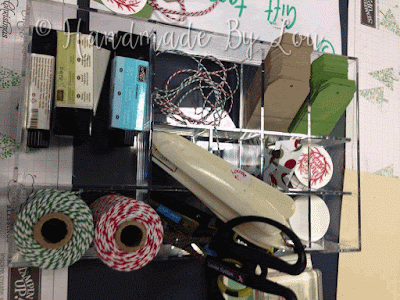
I laid out Stampin' Grid Paper at each place at my table, and had all the bits and pieces in easy reach. I found this clear plastic organiser at the cheap shop - I think it is supposed to be for makeup - and it was perfect for the glue sticks, bone folders, big rolls of baker's twine, scissors, and tag elements. Not shown: a big pack of baby wipes for easy clean up.
It was a huge day - by the end, my hands were stained green, my feet were throbbing, and my lower back was aching (clearly I'm soft and not used to being on my feet all day), but I'd had a lovely day. I think the girls enjoyed it too.
So to sum up, here are my tips:
1. Keep it simple. The greater the number of children, the less likely the will be to want to wait their turn, so quick turnaround is essential. One layer cards; one ink pad per stamp.
2. Have shared tools like scissors and glue sticks easily accessible and plenty of them.
3. Preparation is key. Do as many steps beforehand as you can to save time.
4. DON'T FORGET THE BABY WIPES!
5. Have a sample on a little stand so the child knows what it looks like,
6. Comfortable shoes. Duh.
I hope those of you who craft with children find this useful!
Here's what I used the create the cards and tags:
Product List


No comments:
Post a Comment