Showing posts with label Big Shot. Show all posts

Friday, 19 December 2014

Make Your Own Christmas Banner


Do you decorate your home for Christmas?  

While I love fairy lights, in Australia we don't get a white christmas, so these are a little over the top for my house!


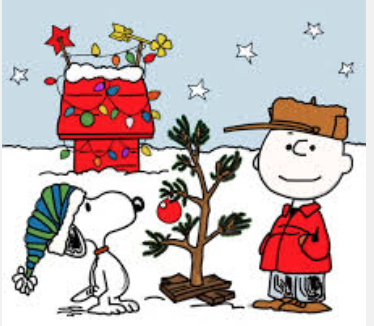
Or is your idea of Christmas decor a sad "Charlie Brown" style tree?


My own style falls somewhere between these.  

This year, I've decorated my entryway with some fairly lights and a banner I made using my Big Shot, a punch, string and cardstock.  You could make it without a Big Shot but you'd need to draw a template and cut each piece by hand.  

It's fairly simple - I used Kraft Cardstock (which is a heavier weight cardstock) from the main catalogue, and cut out the banner pieces using the Party Pennants Bigz L die.  I made sure I had enough pieces to alternate the shapes for each letter.  The great thing about the Bigz dies is that they will cut through fabric, cardstock, chipboard, cork sheets, felt, etc.  


I then put each piece through the Big Shot again with a variety of embossing folders - of course, because I subscribe to the "she who dies with the most craft stuff, wins" philosophy, I pretty much have all the embossing folders in our catalogue, LOL.  But you could use the same one for each pennant, or even leave them plain.  I then edged each pennant with white craft ink, and punched holes for the string at the top.


I used one of the tag shape framelits from Chalk Talk to cut out tag shapes out of the Under the Tree speciality DSP (the same DSP I used to cut out the letters) and the Star Framelits to cut a gold Glimmer Paper star for the letters in "Christmas".  I did that because it was hard to see the letters on the darker coloured cardstock.  The red tags had enough contrast without using the gold stars.


In these detail shots you can see the fun texture added to each pennant with the embossing folders.


I assembled the banner and hung it in my entry hallway using those clear Command hooks, then strung battery-operated fairy lights along the top.  Done!

Have fun making your own Christmas banner - this is one of those projects the kids could help you with, if you like.  


post signature


Sunday, 14 December 2014

Bokeh Background Christmas

Have you seen the Bokeh Background trend that's all over Pinterest?  Do you know what "Bokeh" is?
Its a photography technique where you get a pretty blurry effect when photographing lights.

Here's an example:  


There are plenty of ways to achieve this look - and I'm hoping to try a few more in the next few weeks when I have some time to play.  

I found a blog showing one way to make a Bokeh Background by a clever US Demonstrator, Deb Valder - you can see it HERE.

Here's my version of her card:


I was going for the effect of Christmas lights on a green Christmas tree, what do you think ?


I used Garden Green ink sponged onto Whisper White paper for the background and sponged Whisper White Craft Ink using a template I made using circle framelits and my Big Shot.  The small circles are made with a dauber and some non-Stampin' Up! chalk ink I had in my stash.  

post signature

Monday, 21 July 2014

Product of the Week - Hexagon Hive

I'll admit I'm a little bit obsessed with hexagons recently.  When I was designing a project for our recent Launch, I couldn't get the idea for this simple, one-layer card out of my head:

To make it, I cut out a stencil with the Hexagon Hive framelit and some scrap card stock, then sponged ink in the hexagon spaces using a sponge dauber.  It was a little time consuming, but I found it quite therapeutic and I was watching a movie while I was going.  I wanted an ombre look, so I graduated colours from Lost Lagoon to Smoky Slate.  Some of the hexagons I outlined with my Basic Black Stampin' Marker too.  

The Happy Birthday was stamped in Strawberry Slush ink and cut out with the cute Word Bubbles frame lit, and popped up on Dimensionals.  It wasn't until after I had prepped this card for the Launch and showed it to Steph (my Stampin' Sista) that  realised that there was nothing new (apart from the colour Lost Lagoon) on the card!  I hadn't realised that the Remembering Your Birthday set was in last year's catalogue too.  Hey, it was new to me!  LOL.  As we try to make our projects for Launch using new products, I ended up doing the stars/hearts stencil card instead which borrowed the same layout and colours.  

I still really like the simplicity of this card.  And now I have a few on hand !

Here's what I used to make this card - as usual, you can purchase them from my online store:
I'll post another project using hexagons tomorrow.


post signature

Getting closer....

It's nearly that time of year, where the retirement list comes out.  That means the in-colours we've loved the past 2 years are leav...