Showing posts with label Christmas. Show all posts

Friday, 19 December 2014

Make Your Own Christmas Banner


Do you decorate your home for Christmas?  

While I love fairy lights, in Australia we don't get a white christmas, so these are a little over the top for my house!


Or is your idea of Christmas decor a sad "Charlie Brown" style tree?


My own style falls somewhere between these.  

This year, I've decorated my entryway with some fairly lights and a banner I made using my Big Shot, a punch, string and cardstock.  You could make it without a Big Shot but you'd need to draw a template and cut each piece by hand.  

It's fairly simple - I used Kraft Cardstock (which is a heavier weight cardstock) from the main catalogue, and cut out the banner pieces using the Party Pennants Bigz L die.  I made sure I had enough pieces to alternate the shapes for each letter.  The great thing about the Bigz dies is that they will cut through fabric, cardstock, chipboard, cork sheets, felt, etc.  


I then put each piece through the Big Shot again with a variety of embossing folders - of course, because I subscribe to the "she who dies with the most craft stuff, wins" philosophy, I pretty much have all the embossing folders in our catalogue, LOL.  But you could use the same one for each pennant, or even leave them plain.  I then edged each pennant with white craft ink, and punched holes for the string at the top.


I used one of the tag shape framelits from Chalk Talk to cut out tag shapes out of the Under the Tree speciality DSP (the same DSP I used to cut out the letters) and the Star Framelits to cut a gold Glimmer Paper star for the letters in "Christmas".  I did that because it was hard to see the letters on the darker coloured cardstock.  The red tags had enough contrast without using the gold stars.


In these detail shots you can see the fun texture added to each pennant with the embossing folders.


I assembled the banner and hung it in my entry hallway using those clear Command hooks, then strung battery-operated fairy lights along the top.  Done!

Have fun making your own Christmas banner - this is one of those projects the kids could help you with, if you like.  


post signature


Sunday, 30 November 2014

Quick 'n easy tags with My Digital Studio


I love being able to make things on the fly - let's face it, with all the craziness going on at this time of year, I'm never as prepared as I'd like to be.  This is something you can have up your sleeve - you can make them up quickly, or have them all ready to go, depending on your schedule.  
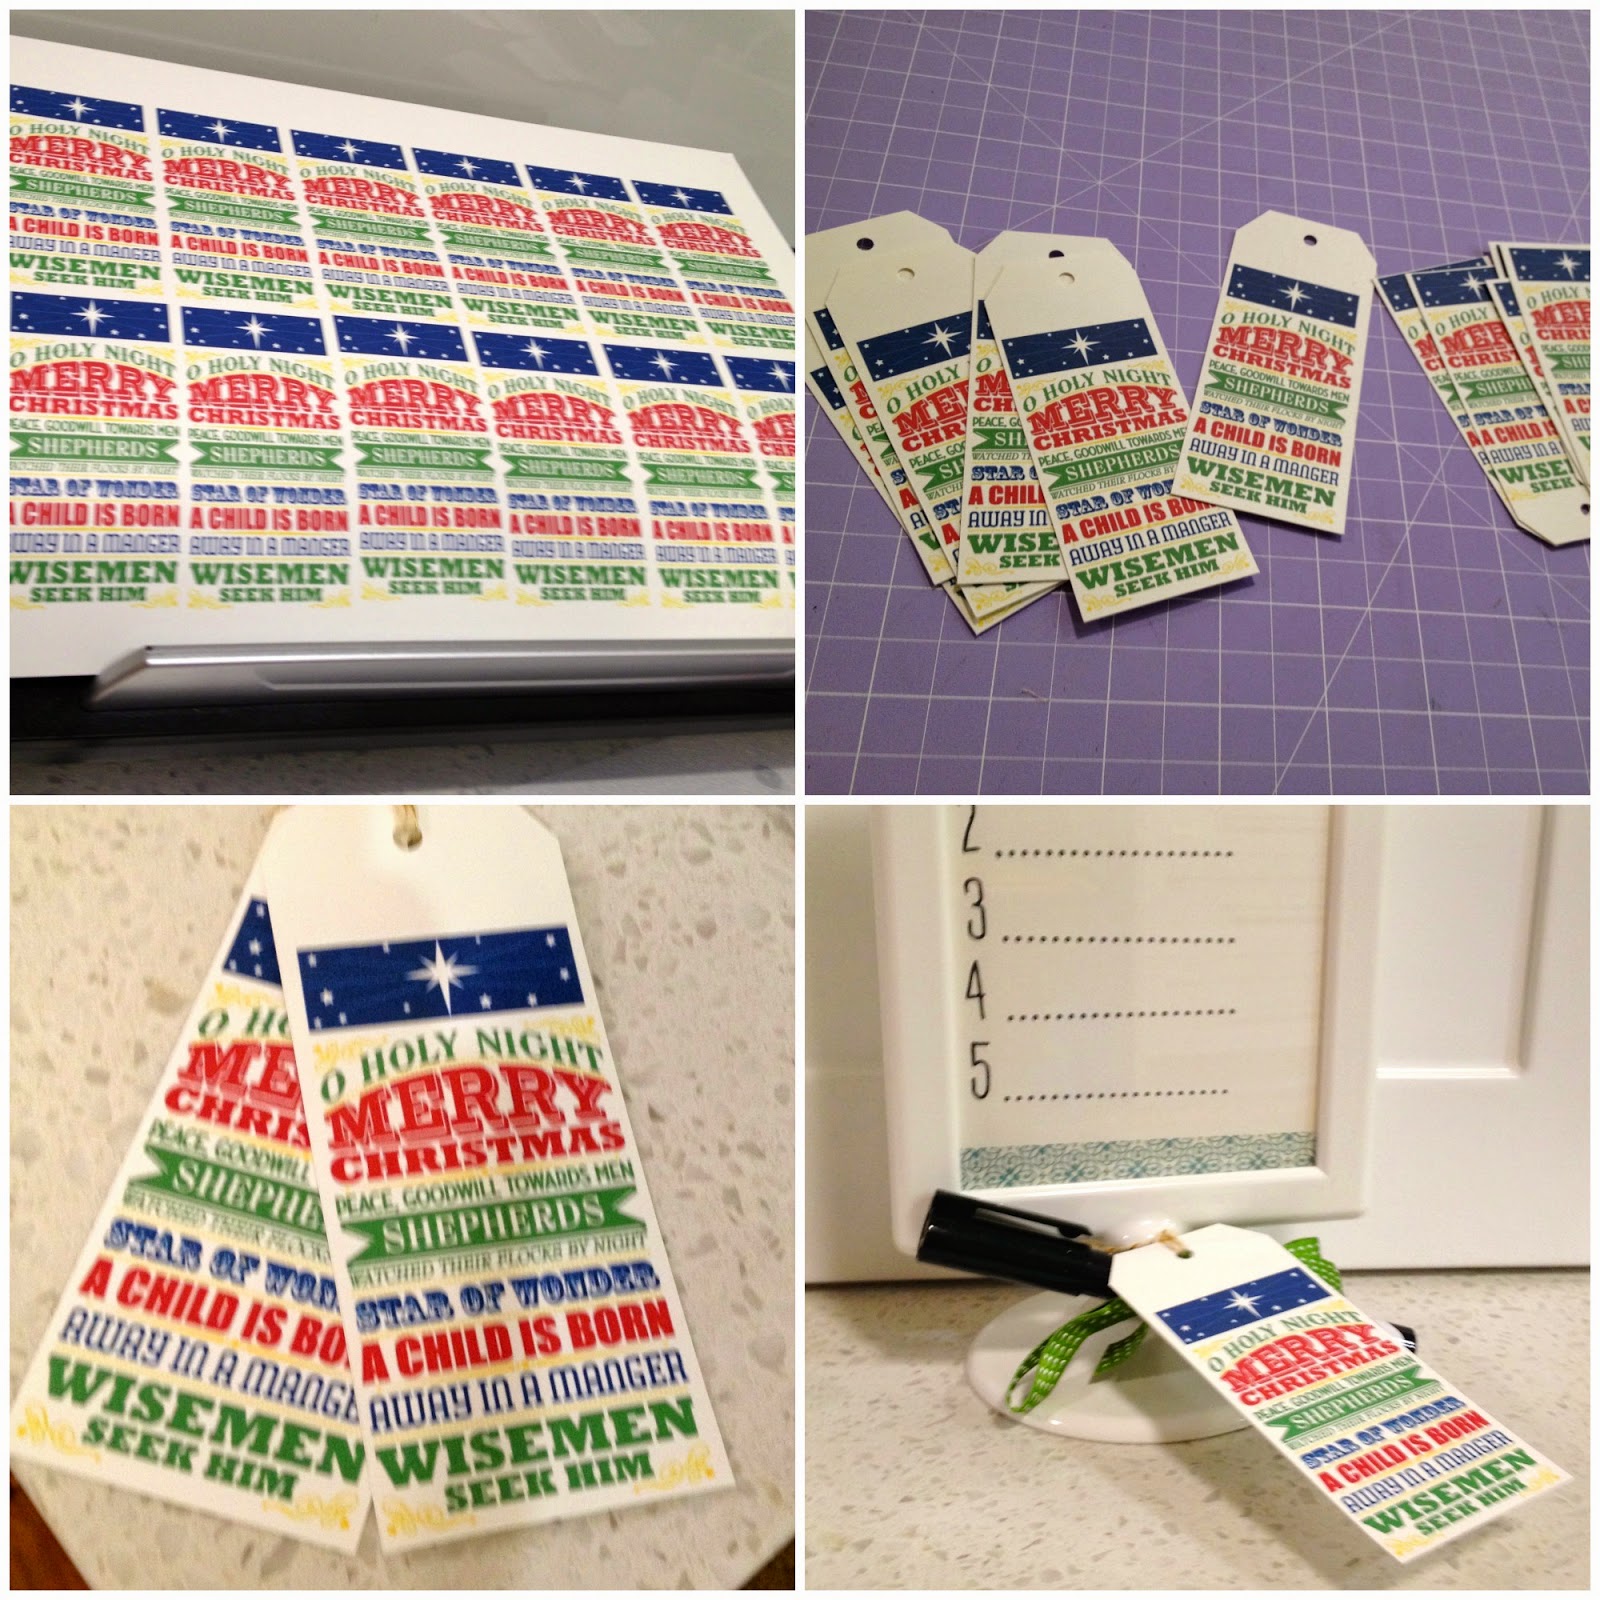
This MDS download is perfect for tags - or for a bit of Christmas Subway Art!  I love it.

All I did was make a blank A4 page for my project, then recoloured the stamp to my liking, sized it to the tag size I preferred, filled the page and printed out a whole page on Whisper White Cardstock on my home printer.  Ta Da!

Then I just used my paper trimmer to cut out the individual tags, and punched the top (or bottom) of the tag with the Angled Tag Topper Punch, put a little Baker's Twine through the hole, and they were done.


If you'd like to make these yourself, click on the links below!
post signature

Sunday, 5 October 2014

Product of the week - Gift Card Envelope

Gift Cards - they are the kind of present I sometimes feel a little guilty about.  Sure, they are practical, and give the recipient the ability to chose their own gift, but they can be a bit impersonal.  Though sometimes, if you don't know the person you are buying for very well, impersonal can be just right!  
That's where a little bit of card stock, and your Big Shot can come in handy.  Now you can personalise the gift card as much as you like!  
Here's one I made recently for a party my son was invited to attend.  He knew his mate would appreciate a gift card, so I managed to whip up this gift card envelope and a matching birthday card in minutes.  And I could look the birthday child's mother in the eye and say "I made it!"
Gift card envelope and matching card - nothing fancy, but 12 year old boys don't usually care for fancy!

Here's the basic envelope as it comes, once you've die cut it with the new Gift Card Envelope Framelit and your Big Shot - I put the gift card in already!  I adhered the bottom flap to the sides.


I decorated the front simply, using some white card stock and a leftover bit of a retired DSP from my stash, adding a bit of green seam binding ribbon to hold the envelope closed.  I stamped "Happy Birthday" in Island Indigo (to match the DSP) and attached the strip to the front with Dimensionals. 


Here's a look at the back:


This framelit is going to get SUCH a workout from me - not just for the constant round of birthdays my four children constantly seem to be invited to, but, HELLO - Christmas!    I can see little love notes, or even an Advent Calendar being made with these.  I'm sure I'll be posting quite a few projects with this clever, versatile product!

Don't you think you could use this too?


To purchase any of these products, just click the images below.

Don't forget to take advantage of the Stock Up & Save Promotion!  It finishes Monday 6th October (tomorrow), so get cracking!


post signature


Tuesday, 24 December 2013

Merry Christmas from our home to yours.


Aren't my 4 Things precious?  

I'm busy today cleaning my house as we are hosting a big Christmas lunch with my inlaws tomorrow.  I have excited Things who keep pawing at presents wrapped under the tree, trying to guess what they are.  

Two of my lovely downlines, Kath and Michelle, came over last night for an informal "team Meeting"  which was really just a catch up before Christmas.


I made them each a calico bag with heat transfer + MDS + my new Silhouette machine, which I forgot to take a picture of.  Michelle gave each of us these sweet tubes filled with mini M&M's, and Kath made us earrings, which she wrapped in this gorgeous mini milk carton.

I've also been tinkering with my new Silhouette cameo and vinyl.  Here's my first project:


I made it a little crooked ( :-( ) but I still quite like it!


I hope you, dear readers, enjoy a wonderful Christmas and a fabulous New Year!

Getting closer....

It's nearly that time of year, where the retirement list comes out.  That means the in-colours we've loved the past 2 years are leav...