Thursday, 11 October 2012

Gift Card Presentation


Gift cards - so convenient, so appreciated.....but sometimes their presentation is a bit blah.

I recently whipped up a couple of cute Gift Card holders from scraps on my desk - I'll do a tutorial soon with measurements, etc.  I pretty much eyeballed these, because they were a "five minutes before we get into the car" kind of job.  I used the Big shot to add interest with the large scallop edgelit on the flap of the blue one, then made a quick belly band from a scrap of DSP.


The Summer Starfruit one was embossed for texture and again an edgelit was employed for the inside.

Too easy!


Wednesday, 10 October 2012

Good things in Small Packages


One of my lovely customers came around today to collect products she's purchased through me, and I had made this cute tag for her using the Lovely Little Labels set and matching punches, as well as the
cute mini alphabet Simply Serif.

The scalloped rectangle is a Sizzlet I cut with the Big Shot, of course.

Here's another picture to get a better idea of the size (don't mind the rubbish on my table):


And another closeup:


I'm so pleased Mauryeen loved the tag - it is much more fun making cute things for people who appreciate them!  

Here's what I used:

You might have missed this in the Catalogue - it is a must have tool !  

These are the sweet little stamps that match the punches - I have heaps of ideas for them!
The matching tiny punches

Really cute tiny alphabet - you'll need the Stampamajig to ensure the letters are placed exactly where you wish them to go, unless you want them a little "rustic."


I wasn't sure how big this would be; it is quite tiny.  Because it is clear, you can see where to position your stamped image.


Tuesday, 9 October 2012

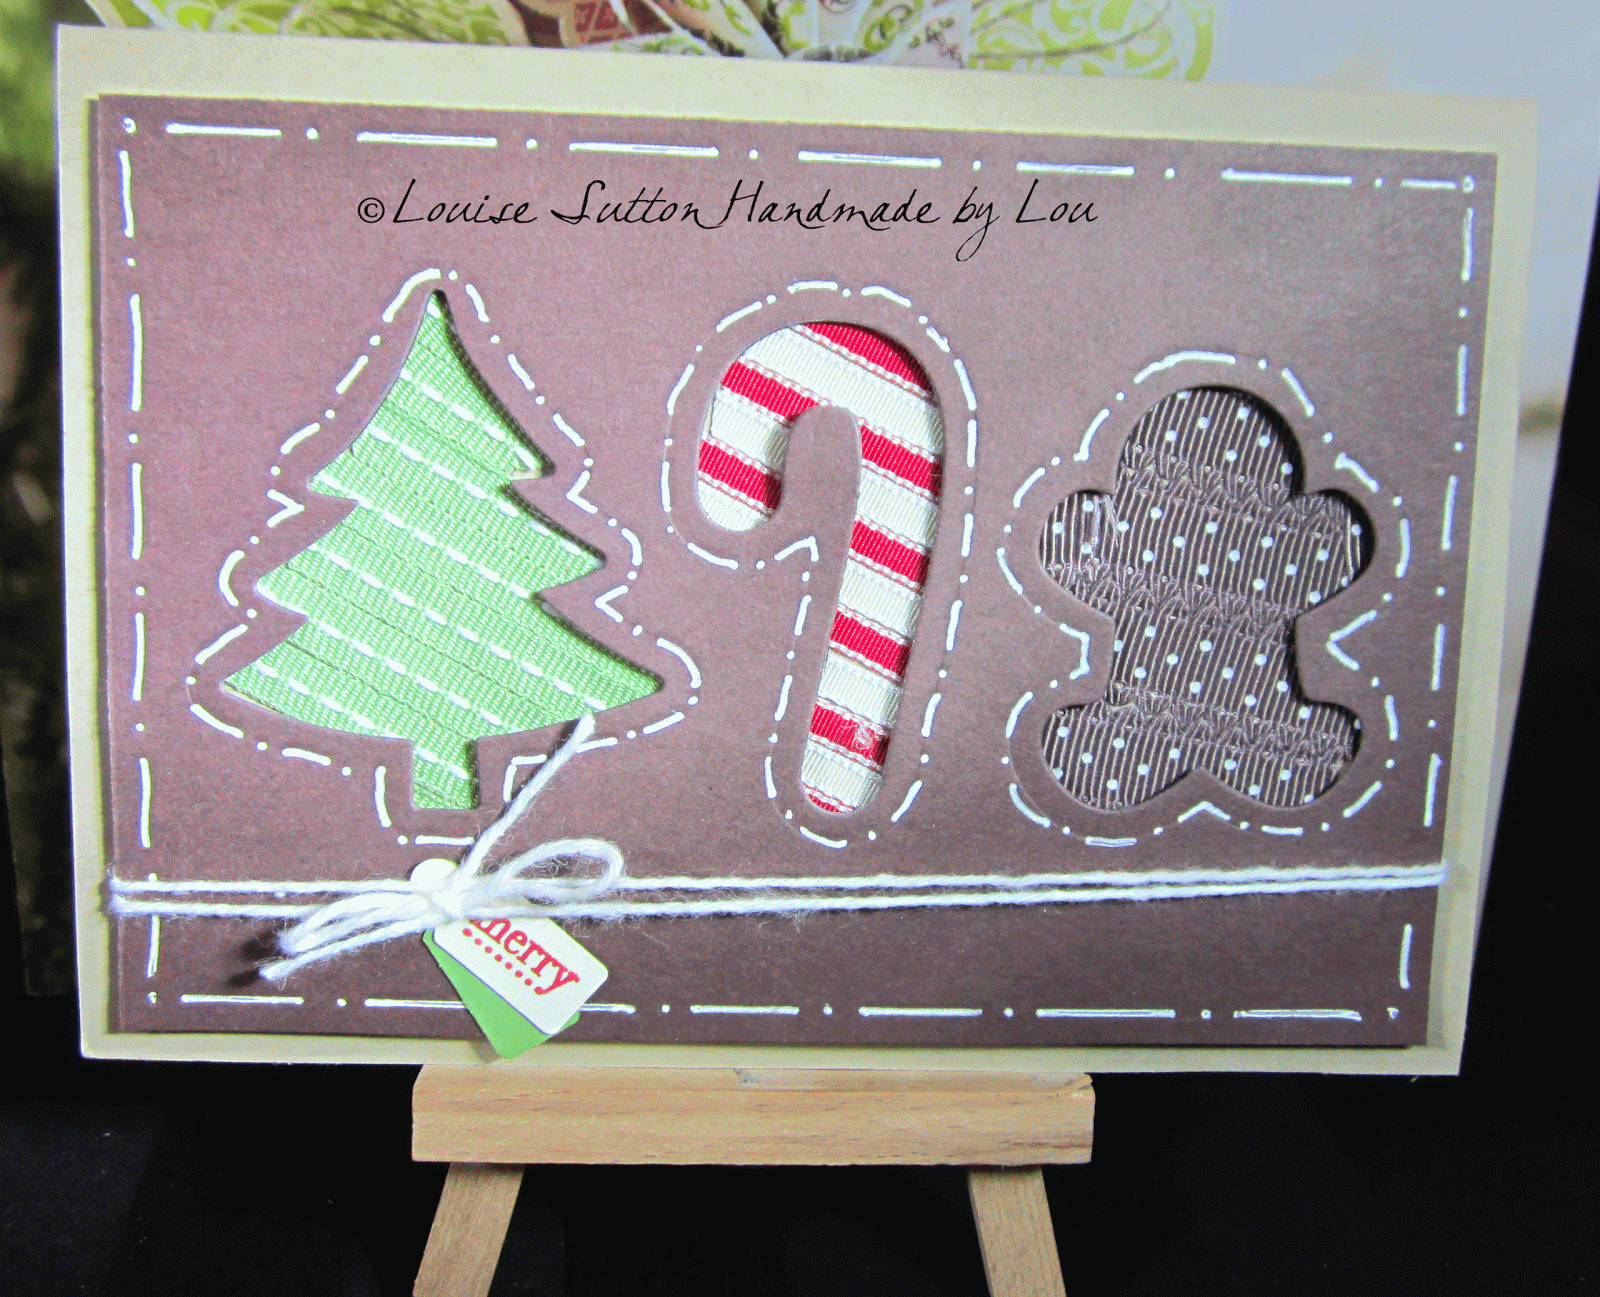
Christmas Card CASE

 I was browsing the Web recently, and came across this gorgeous card by a talented US Demonstrator, named Dawn Olchefske  and had to try it.  Clever Dawn adapted the card from one made by another Demonstrator, Sami Brown.  You should check out their blogs, if you are looking for inspiration!

Dawn has even done a video on her blog, explaining how she made the card.  You will see mine is pretty much the same as hers, except I didn't have the same ribbon, and I used Chocolate Chip card stock instead of Crumb Cake.

Such a cute way to use the negative images left when the Holiday Collection Framelits are cut out.  You might use the shapes for gift tags, perhaps?  These Framelits are in the current Occasions Mini Catalogue.    If you live in Australia, contact me to order the products used to make this card (if you don't already have a Demonstrator).  I have a few more ideas with this set - it will get well used!


Have fun with your Framelits!


Thursday, 4 October 2012

MDS Content Disc Tutorial: Downloading the MDS Content


Using Stampin’ Up! MDS Disc Content with Photoshop Elements

Disclaimers and explanations:  
This tutorial is aimed at the Australian/NZ market where we don’t yet have MDS available, but do have the discs available to purchase in our Stampin’ up! product range.   I am using PSE9, on my Mac.  I have no idea how different any other version of PSE is, or what to do with other photo editing software.  I am equally baffled by Windows.  You are on your own with PCs!

 Already a Digital Scrapbooker?
If you already do Digital Scrapbooking with Photoshop Elements, then you probably already know how to use the brushes, embellishments, and digital papers contained in the MDS Discs.  Please note that you cannot use the Photobook  or scrapbook page templates as “quick pages” where you simply drag and drop your photographs.  This is disappointing, admittedly.  You will be able to use them in hybrid pages.

1. First Step:  Downloading MDS Content.

For the purpose of this tutorial, I’m using the Eventful Year Disc.

When you insert your disc, you’ll encounter this:


 Click on the “Extract for Other Applications” icon, and wait for it to download.
Once downloaded, as with any digital scrapbooking products, save it to your computer.

When you open the Eventful Year content, you’ll see something like this:


If you click on the MDS jpeg icon (the one highlighted), you’ll see a picture of everything in the disc, like so:


<


Well, that’s not actually true.  You get much more!  Not shown in the picture are all the stamps (Brushes), DSP,  and embellishments.

 Loading and Saving the Stamps/Brushes into PSE

This process is the same for any digital brushes you might have.  These are files with .abr at the end.  What PSE calls “Brushes” are stamps you can use in your projects.

Open PSE, click the little paintbrush icon along the left hand side menu, then click on the drop down Brushes menu , as shown:


< />
Then you’ll see some arrows to the right of the Brush drop down Menu.  Click there to go to another drop down menu, and select “Load Brushes”


Go to wherever you saved the disc content on your computer and select the .abr files to load.

Now that your brushes are loaded up, you need to save them!

Go to the same drop down box as before, but this time select “Save Brushes”, follow the prompt to save.


< />
How to Use the Digital Content

Now you have it loaded up, what do you do with it?  Quite simply, anything you like!  I’ve used it to make a Facebook Timeline Banner, a Blog Header and buttons, Scrapbook Layouts, mousepads, luggage tags, marketing tools, and more.  

What about the Templates?


<


If you are a regular Digital Scrapbooker, you’ll have a supply of “Quick Pages” you use to make easy layouts - where you just drag and drop your photographs into the template and call it good.  Unfortunately, you cannot do that with the MDS Content and PSE.

You can use the template as the basis of a hybrid page - where you combine traditional scrapbooking methods with digital scrapbooking.  In this case, you’d print out the template (at home, scaled to an 8 x 8 size perhaps unless you have an A3 printer) and then apply your photographs, printed at the appropriate size in the template.

I’ll be covering the beginning-to-end creation process of some projects soon.  Watch this space!


Wednesday, 3 October 2012

MDS Content Discs without MDS?


I started to wet my toes in the ocean that is Digital Scrapbooking a couple of years ago, and I was THRILLED to see that our Aussie/NZ catalogue now includes MDS Discs with digital content - though not the full MDS, yet.

I have a Mac and Photoshop Elements 9 (PSE9).  And although it has been about a year since I used PSE9 to do anything other than edit my photos and add a watermark, I am starting to play around with it some more because of the Stampin' up! MDS Content Discs.

Here is an early attempt at a Christmas Card using the Remember December disc:


OK, it is a little rough, because I was trying to make this in a hurry while my children were banging down the door to use the computer to play Minecraft.  I can't wait for them to go back to school so I can play on my own computer!


Here's what I learned:

1.  If you've never tried digital scrapbooking and don't have PSE or something similar - wait until we get the full MDS (or perhaps MDS2, because that's what they are currently using in the USA) before purchasing the discs.  

The reason I say this is because you won't be able to create projects immediately without PSE or whatever other Digi Scrap software you use (Disclaimer:  I only know about PSE9, because that's what I use!).

The discs were designed to work seamlessly with MDS.

2.  On the other hand, if you already know you'll love it, and don't want to miss the discs we have currently (in the Holiday Mini, or Hostess collection, for example) while you wait for MDS to hit our shores, contact me to purchase (unless you already have a Demonstrator, in which case, contact her!) while we wait for MDS.  We've been told it could be another 12 - 24 months for us (perhaps in the 2013 Catalogue?  That's what I'm wishing for!) before we get the full MDS.

3.  If you are already a digital scrapbooker - you'll love having the Stampin' up! DSP, stamps, and embellishments in your digital toolbox.   I love having some of my favourite stamps loaded as digital brushes!

4.  Downside - the scrapbook templates don't work as "Quick Pages" where you drag and drop your photographs into the template.

5.  Upside - you can use the templates as hybrid pages, or as a blueprint for creating layouts from scratch (traditionally or digitally).

6.  I'm saving for a MacBook Pro for when we do get MDS.   This gives me more time to save my pennies!

7.  I'm enjoying getting back into digital creating - I enjoy the challenge to myself to master new technology.  It doesn't mean I've stopped getting my fingers inky though!

9.  I've been using MDS content to customise my Facebook Timeline, make a personalised Father's day Mousepad for my husband's office, personalised luggage tags as gifts for friends, signage and posters for Launch, etc.  It's a fun way to make business supplies!

10.  I'm writing up a tutorial on how to use MDS discs with PSE9.  Watch this space for details!


Monday, 1 October 2012

It's Spool Time!


There's a new Stampin' Up! promotion for October:  Spool Time!  Quite simply, with every $60 you spend, you get a free package of in-colour stitched satin ribbon!

Here are the details:


And check out this hilarious video made by Stampin' Up!  asking the eternal question:  Will it Embellish?


Betsy's Birthday

I was fortunate to have my lovely cousin (and Downline) Maree over last weekend to spend some time catching up, and creating together.  Maree is a Demonstrator in Dalby, so if you live that way, please look her up!  She is enormously talented, and fun, and she'd be happy to help you with all your scrapbooking and stamping needs.

Aside from the plug, LOL, Maree and I  borrowed each others stamps and had a great time creating samples and perfecting watercolouring techniques.

Here's a card I made with Maree's stamps, from Betsy's Blossoms (can't believe I haven't got this yet!):

Stamps:  Betsy's Blossoms, Wacky Wishes (NEW Hostess)
Inks:  Summer Starfruit, Primrose Petals, Raspberry Ripple, Gumball Green
Other:  Big Shot, Apothecary Accents Framelit

I promptly gave away the card because my daughter had a birthday party to attend today!  Note the envelope I stamped peeking behind the card?

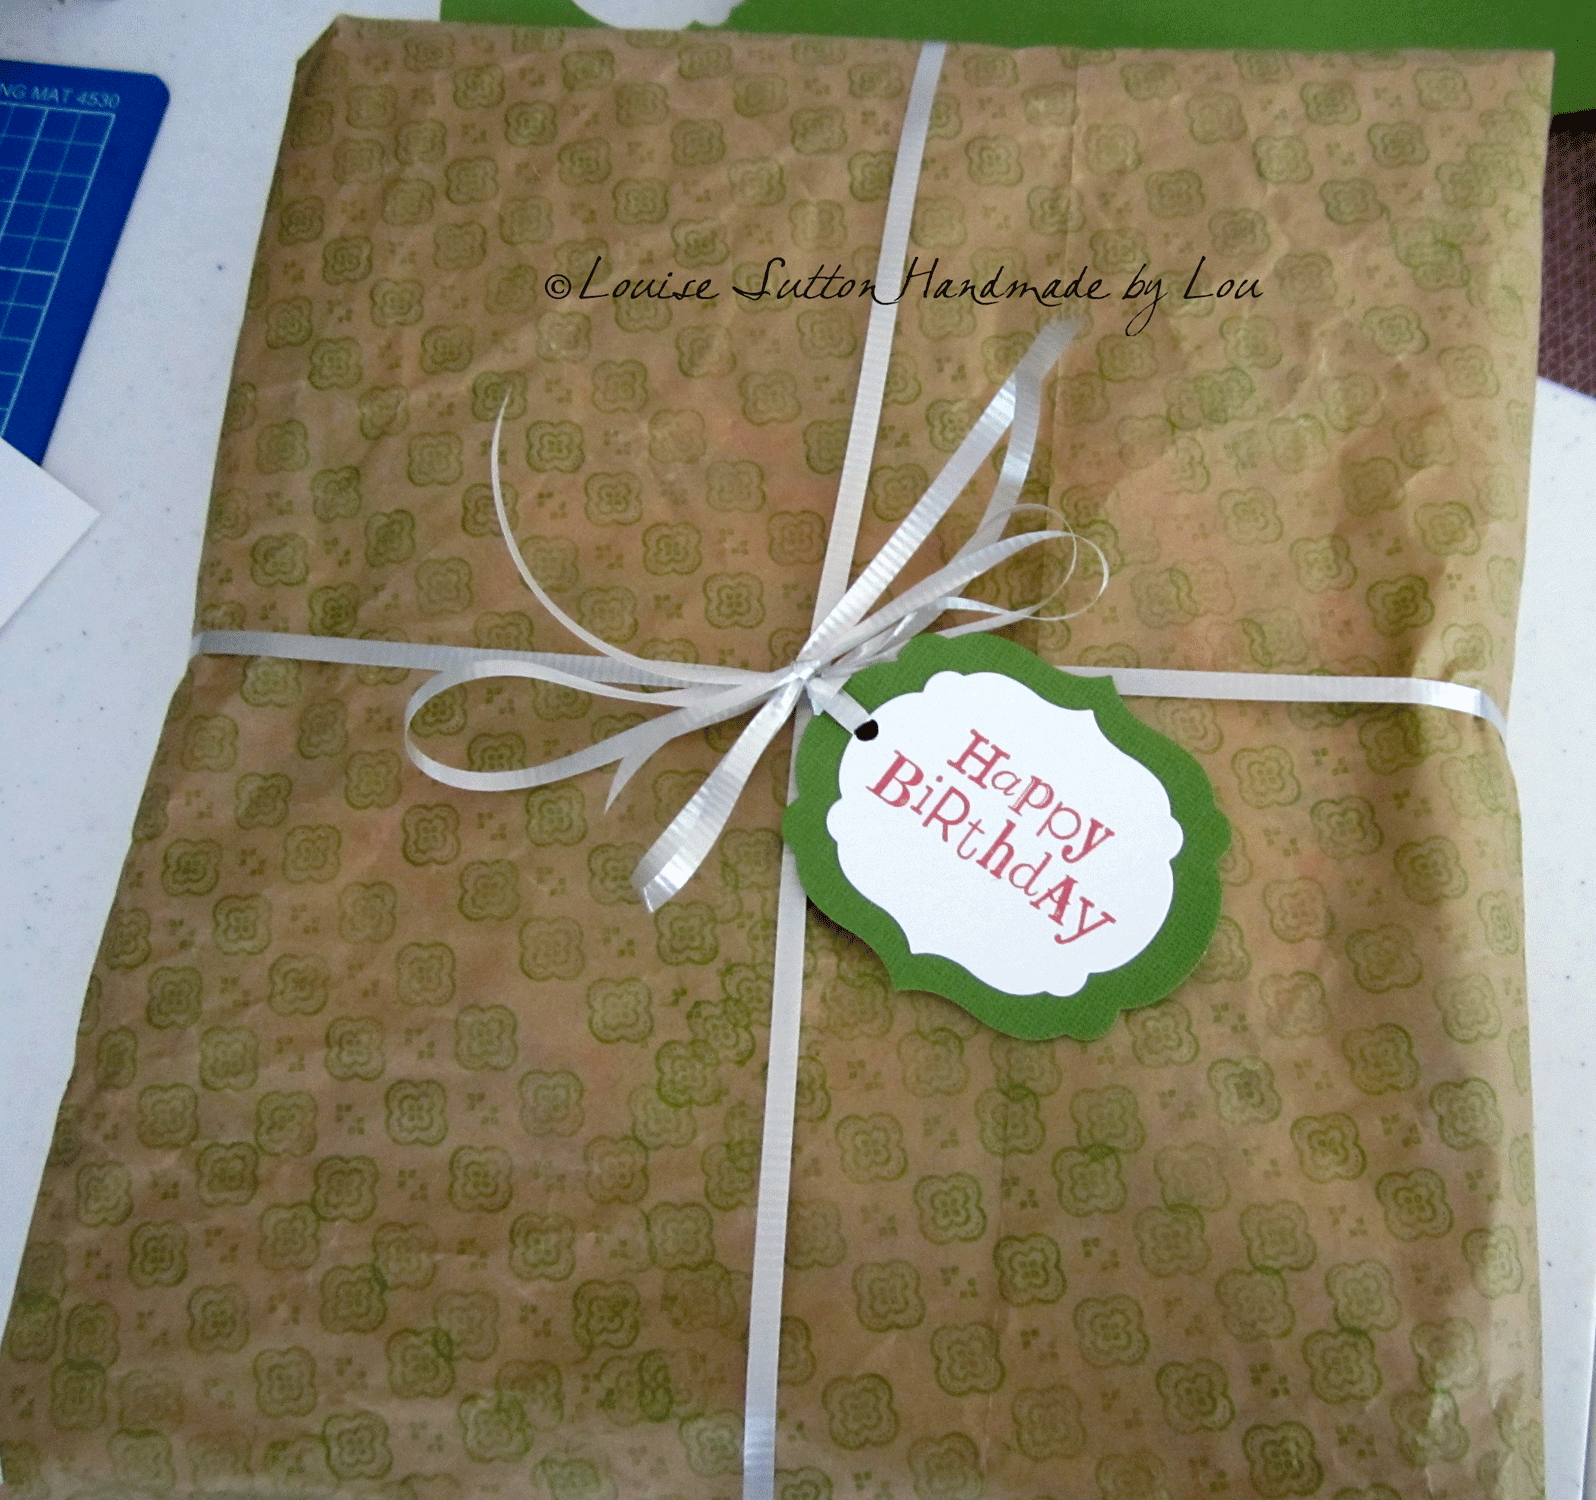
Of course, I also had to make a matching gift tag once I'd wrapped the gift (in recycled brown paper, naturally, stamped with my new favourite Jumbo Wheels):


Stamps:  Allhambra Jumbo Wheel, Wacky Wishes
Ink:  Wild Wasabi, Primrose Petals
Other:  Bigshot, Labels Collection Framelits
As you can see, I'm rather addicted to the new Framelits.  They make creating a pretty gift tag so easy and quick.

I tell my husband I'm saving soooo much money by never having to buy tags, cards or wrapping paper any more.  All the money is going towards my stamp collection instead!


Getting closer....

It's nearly that time of year, where the retirement list comes out.  That means the in-colours we've loved the past 2 years are leav...